Online reporting
1. Log in to the e.Statistics system in a way that suits you. There are 2 possible ways:
- login by entering a username;
- logging in via the E-Government Gateway Portal (instructions on how to log in via the E-Government Gateway Portal).
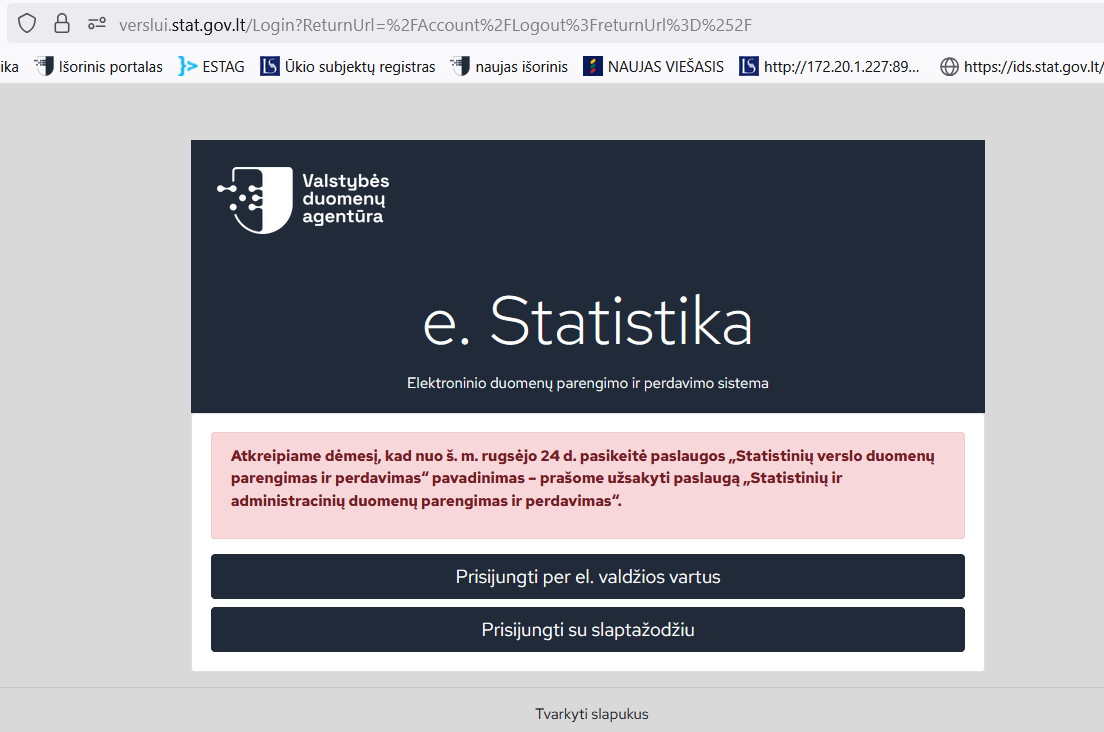
Figure 1. Login method selection window
2. Select the required data provider from the displayed list of represented data providers and click the [Select] button (Figure 2).
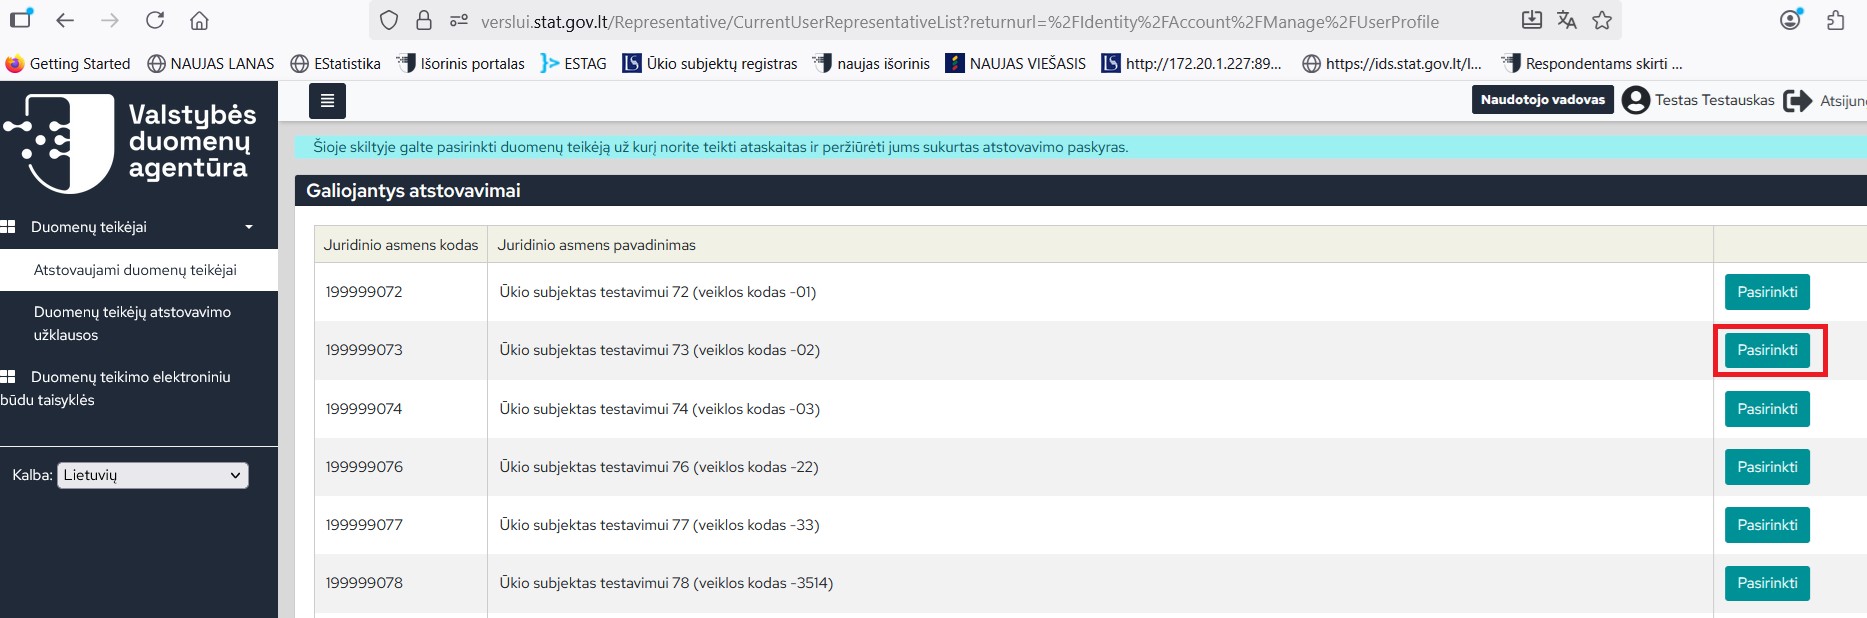
Figure 2. Data provider selection window
3. After selecting a data provider, you will automatically be taken to the list of reports to be submitted window (Fig. 3). It immediately displays the list of reports to be submitted for the current month. To start filling in, click the [Select] button next to the required report.
Note: you can form a list of reports to be submitted according to your convenient search criteria (e.g., reporting period, form type, report, reference year, reporting characteristic). Select one or more search criteria and click the [Search] button (Fig. 3).
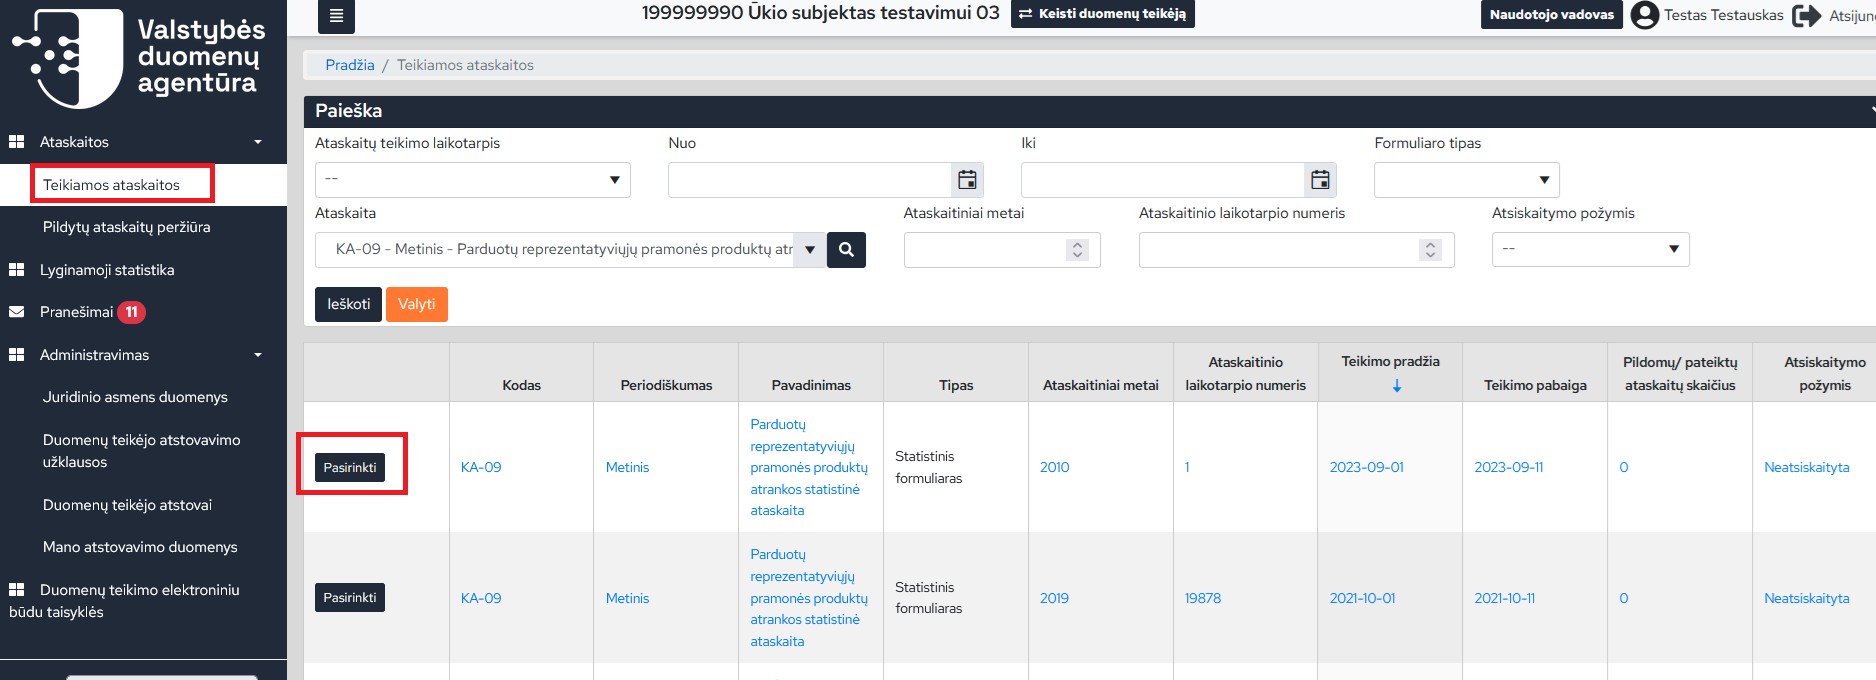
Figure 3. Filling out the report search window
4. When the window opens, you will see the report card (Fig. 4). In it, you can view the legal basis of the report, explanations for filling it out, and download the XSD scheme, if your business management and accounting system supports the software tools for this (instruction “Reporting in XML format”).
5. By clicking the [Create new] button (Fig. 4), a new filling window for the selected report will open.
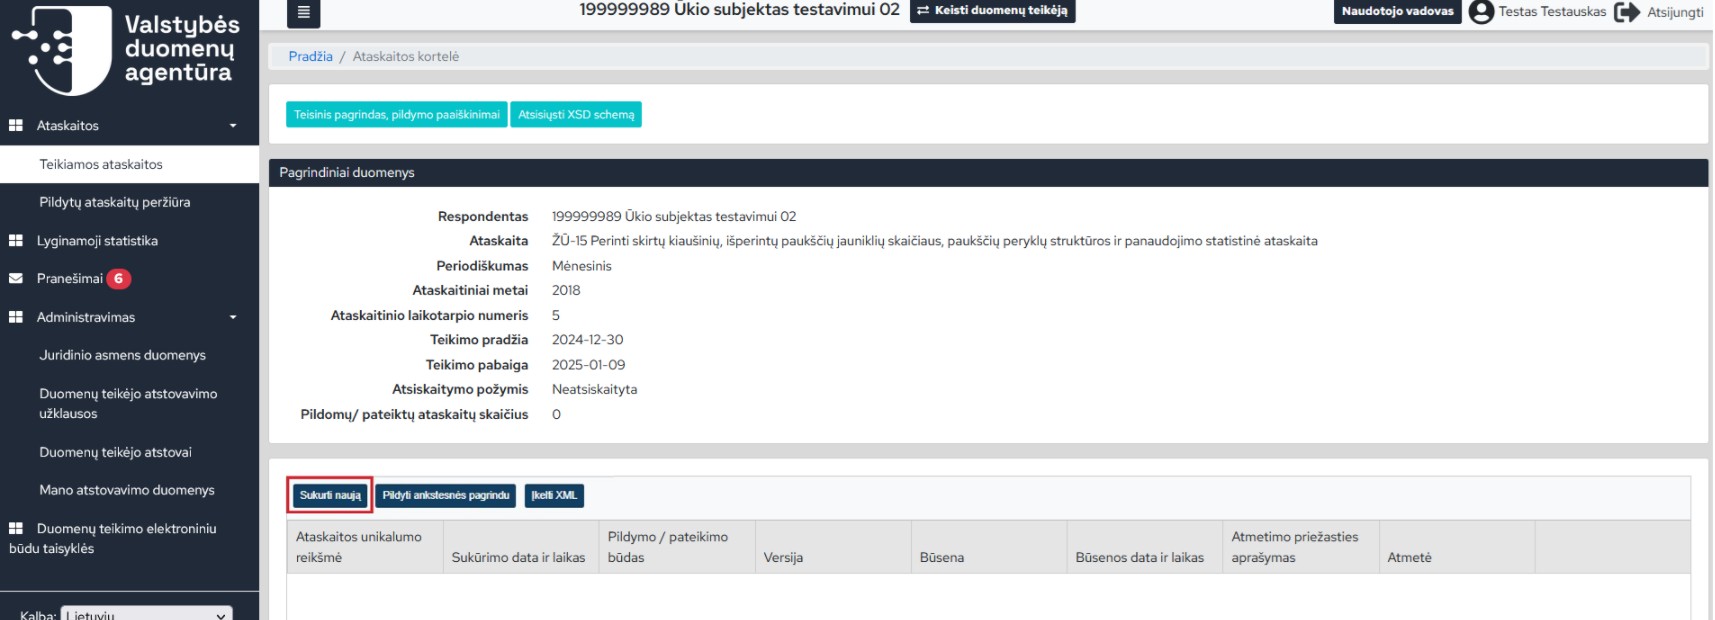
Figure 4. Report Card Window
Note: if you have already started filling out the report earlier (it will be displayed in the report card) and you want to continue filling it out, press the [Open] button (Figure 5) (editing (including continuing filling out) is only allowed for reports with the status “Filling in”).
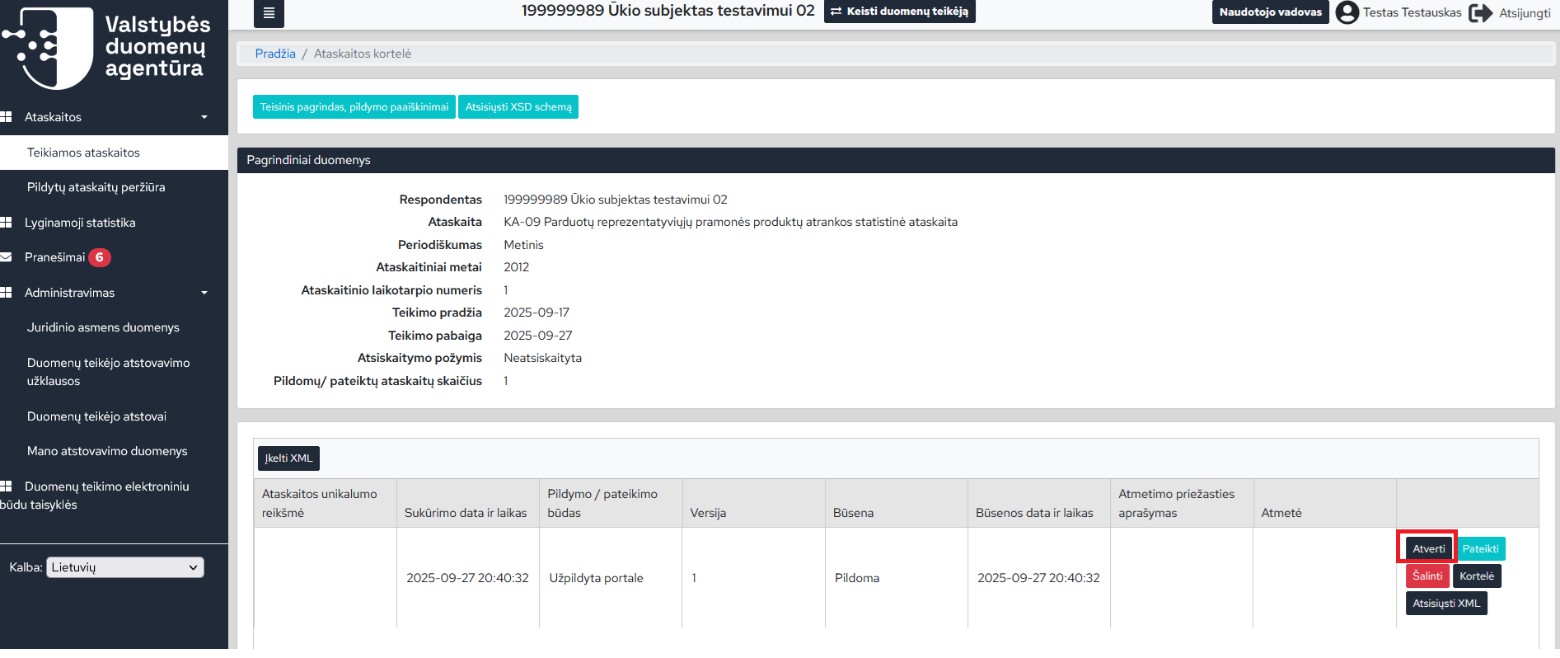
Figure 5. Report card window. Opening a report with the status “Filling”
6. Fill in the opened report by entering the required data and press the [Check] button (Fig. 6).
Note: contact information (name and last name, phone number, email of the person who has filled in the report) is filled in automatically – data of the representative account of the data provider who has created the report is loaded.
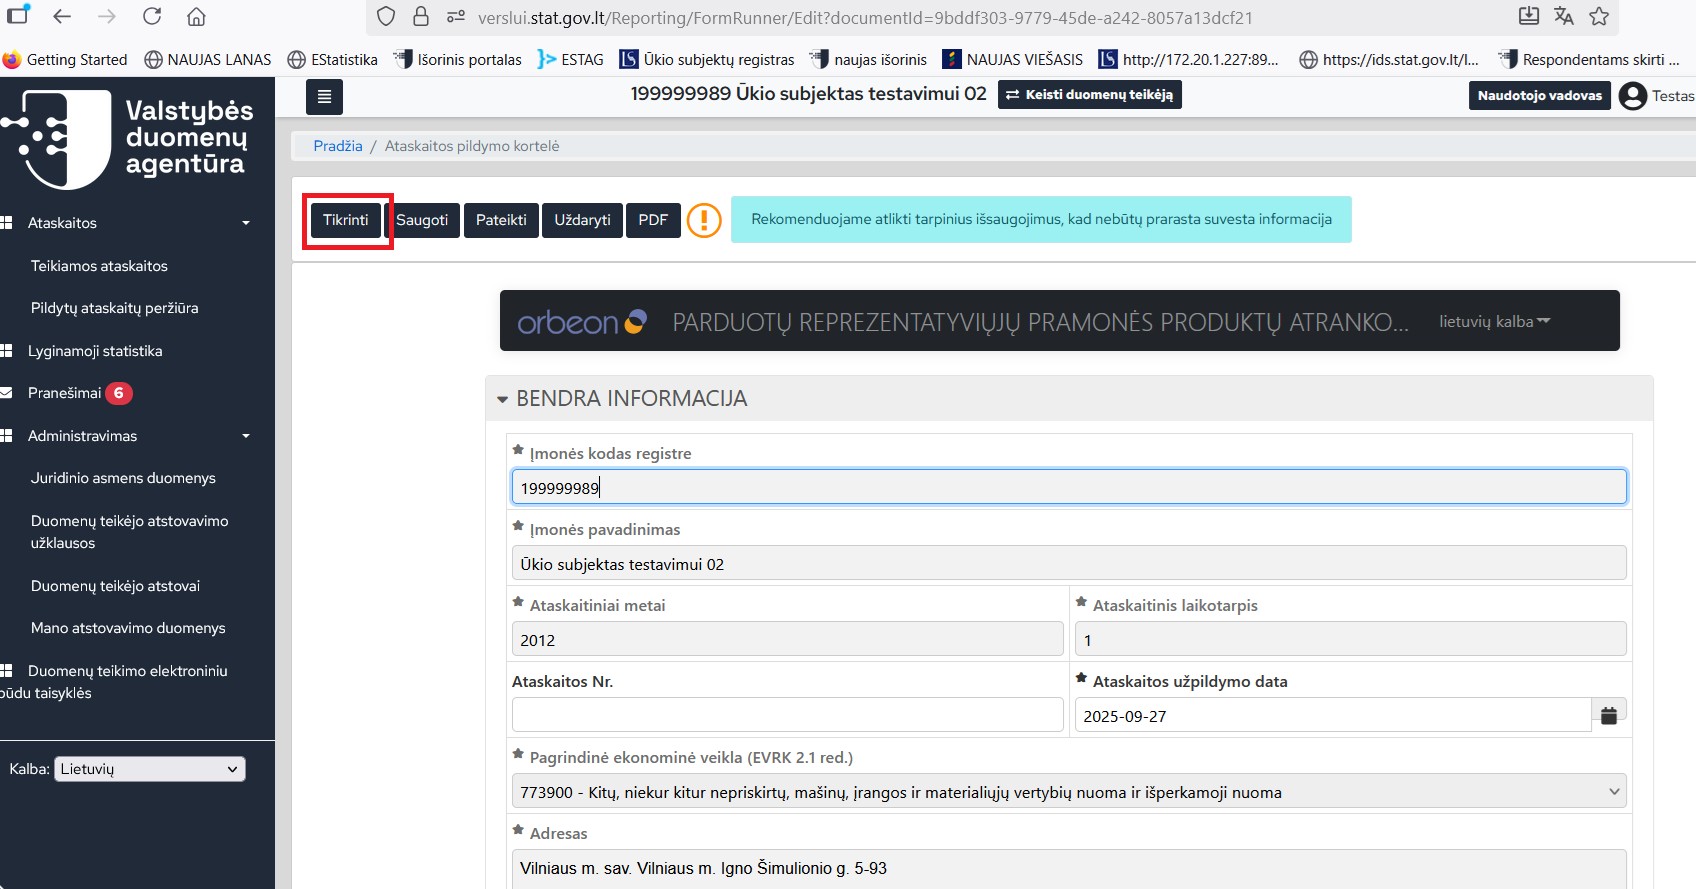
Figure 6. Report filling window
7. The system checks whether data has been entered correctly. If filling errors are detected, the person filling in the form is immediately notified – a warning message is displayed (Fig. 7). By clicking the [View] button, you will be able to continue filling in and correct the errors. At the end of the filled-in report, a list of errors and warnings that are important to pay attention to is formed (Fig. 8). When the user clicks on a specific error message, he is directed to the place where the error is located.
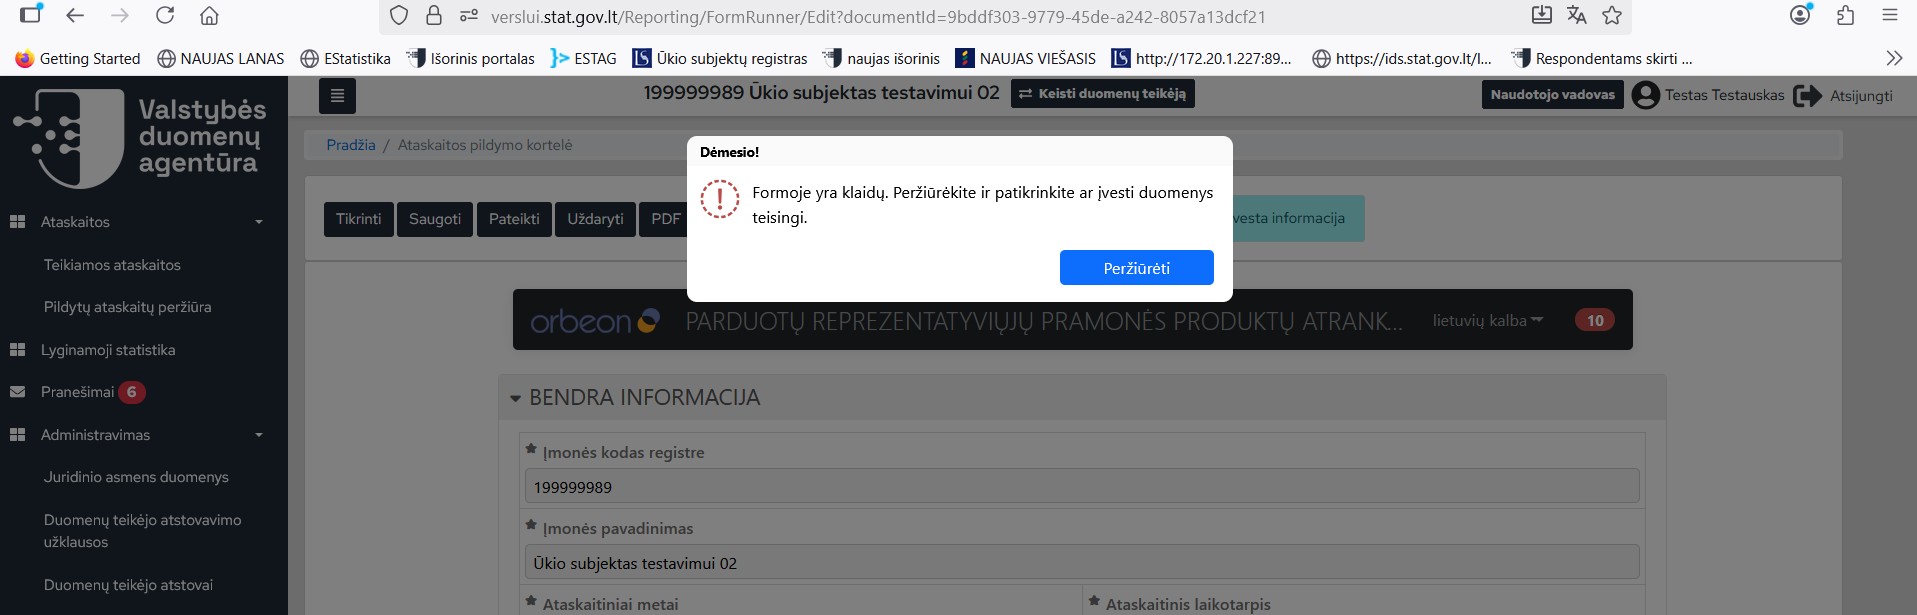
Figure 7. Warning message display
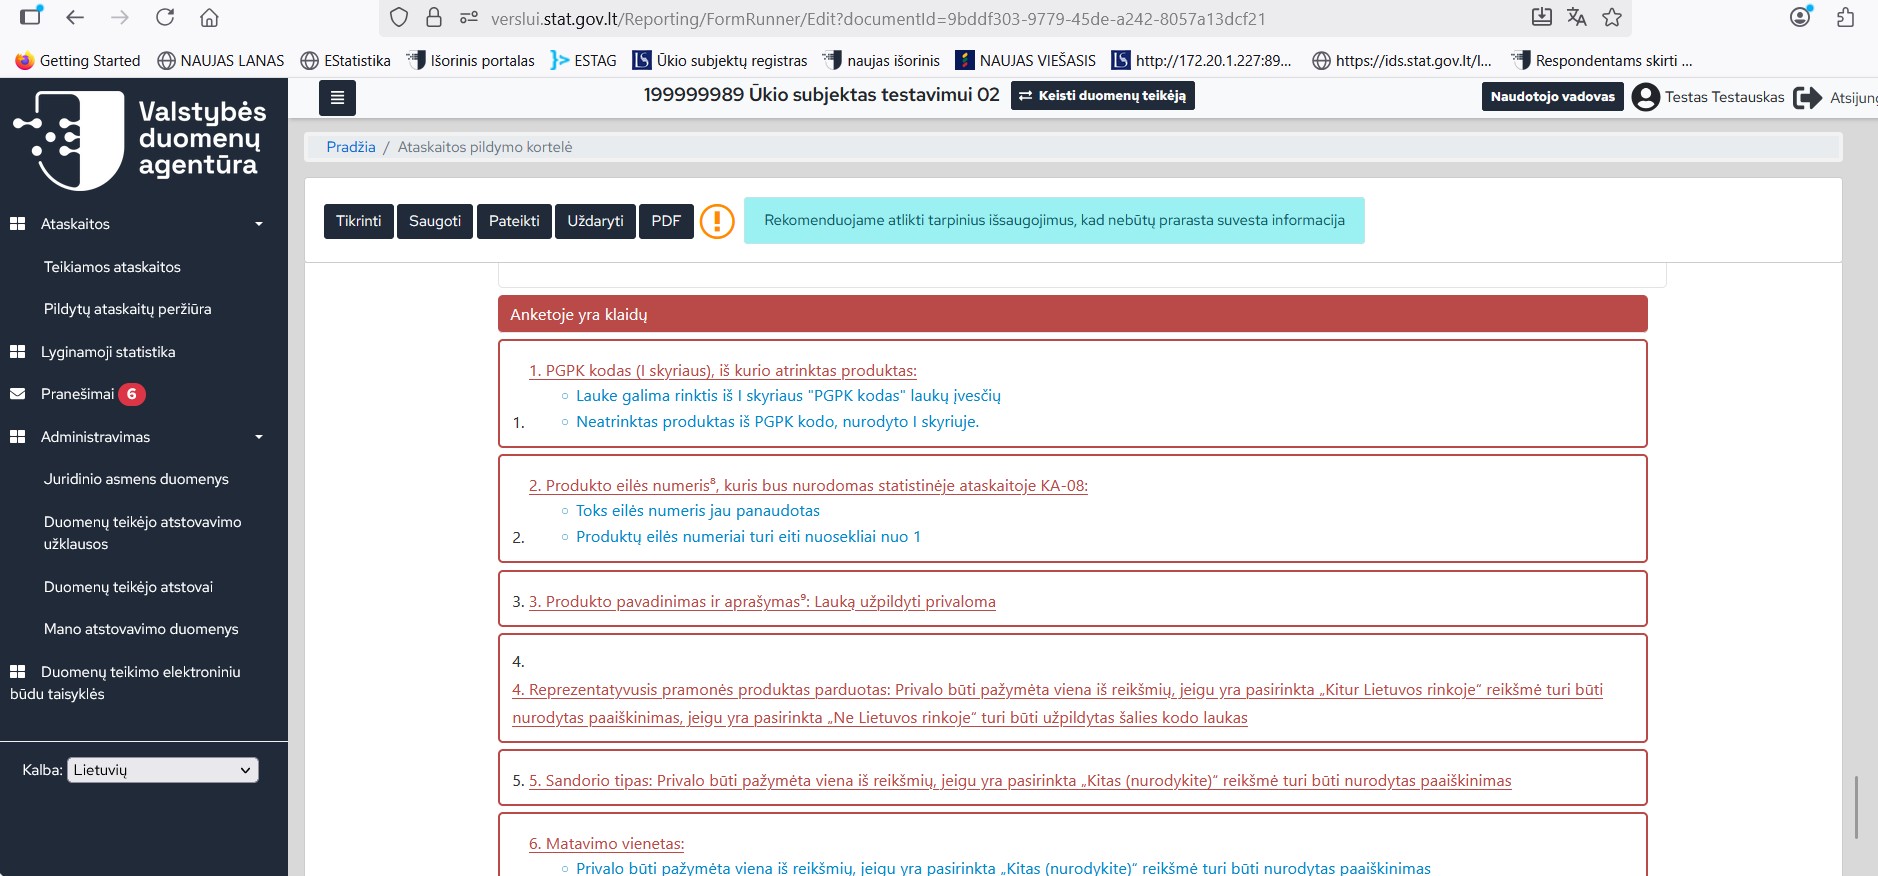
Figure 8. Window for displaying filling errors and transitions
8. When there are no filling errors in the report (yellow warnings with yellow fonts may remain), you can submit the report by clicking the [Submit] button (Fig. 8).
Note: if you have already started filling out the report, but want to continue filling it later, click [Save] and [Close] (Fig. 8).
9. If you did everything correctly – the report is filled out correctly, you will soon be directed to the report card and you will see the message – “Report submitted” (Fig. 9).
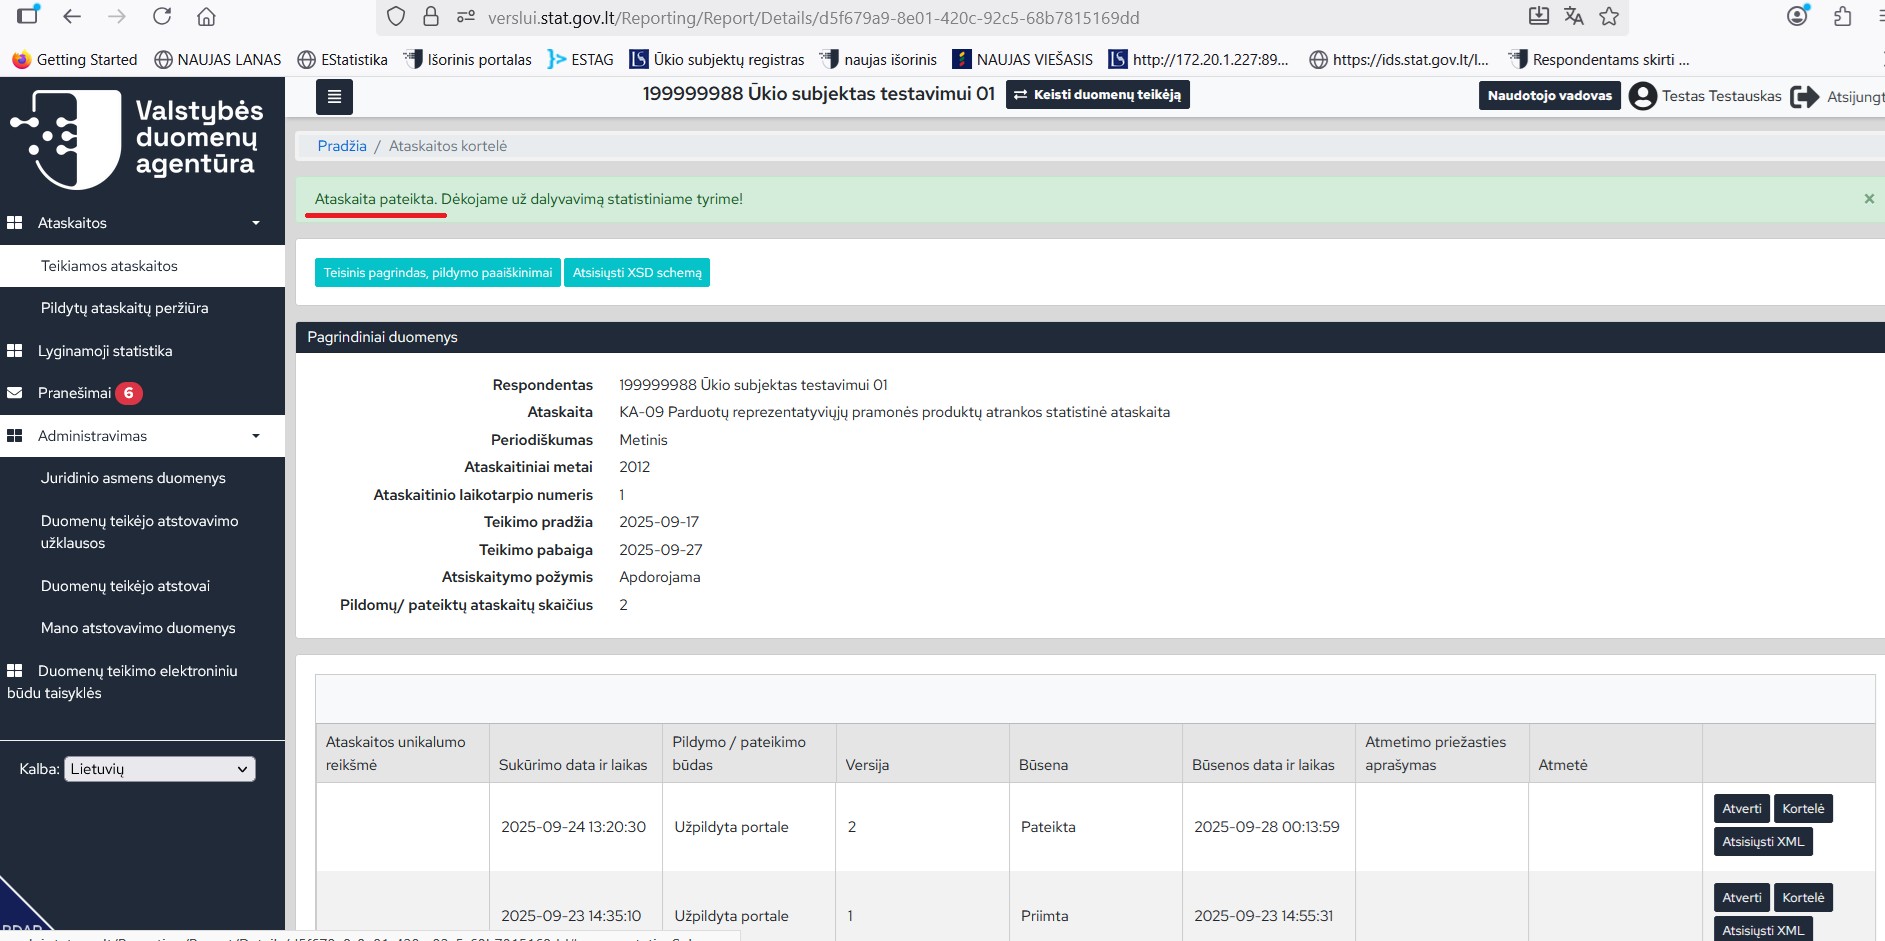
Figure 9. Display of notification about submitted report
10. After a certain period of time, the system will check your submitted report and its status will change.
11. If after checking the report the status is assigned to the report “Rejected”, in the column “Rejection reason description” you will see the reason for its rejection (Fig. 10), adjust the report (click the [Adjust] button) taking into account the rejection reason and submit it again.
Note: by clicking the [Adjust] button (Fig. 10), a new version of the report will be automatically created. Data of the adjusted report will be copied into the new version of the report, which you can adjust taking into account the description of the reason for rejection of the report.
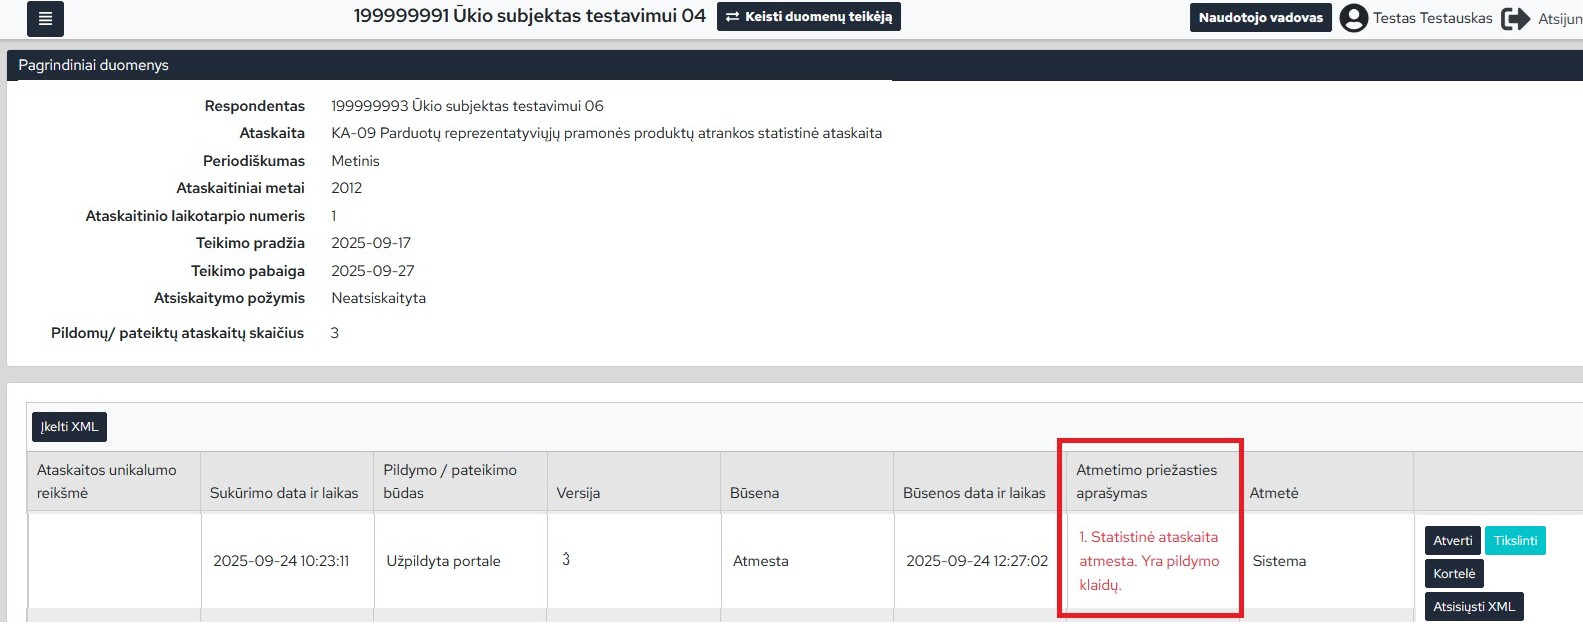
Figure 10. Report card with rejected report information
12. When the report is assigned the status “Accepted”, the data provider is considered to have settled the report for the reference period (Figure 11).
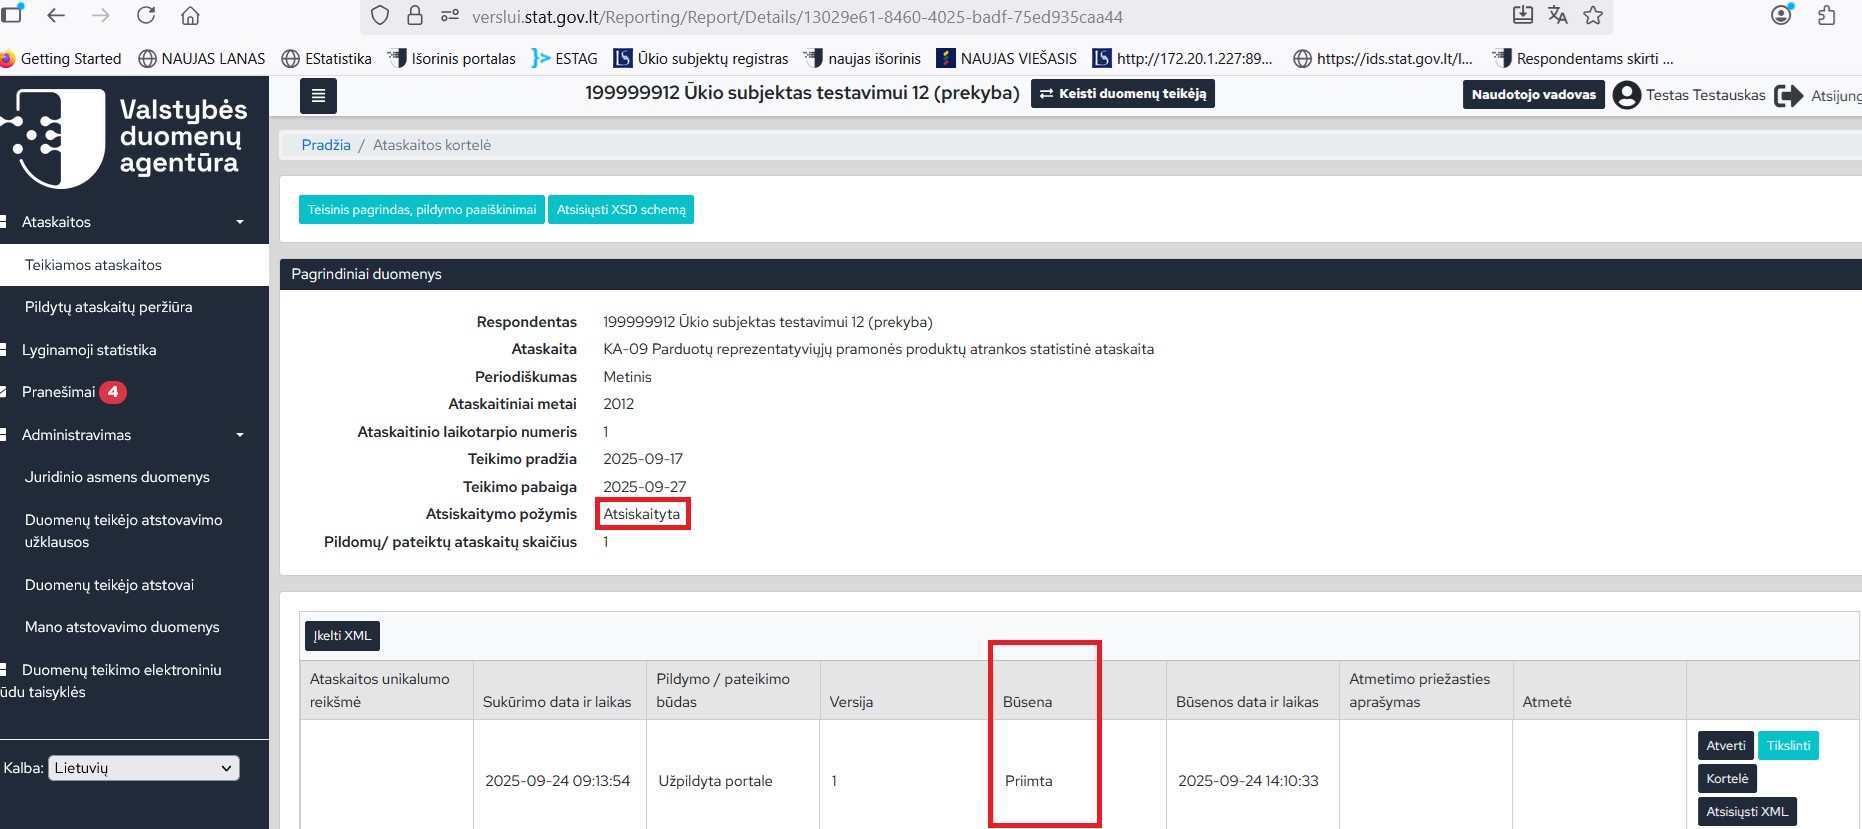
Figure 11. Report card with information on the accepted report
Note: if there is a need to revise the submitted data, press the [Revise] button – a new version of the report will be created, in which you can revise the previously submitted data.
Statuses that can be assigned to reports:
Filling – the user can edit or delete such a report. The system does not perform any automatic actions with such reports.
Submitted – the user cannot edit or delete such a report. The system will check such reports at the scheduled time and assign another status.
Processing – such a report is awaiting a more detailed check, it is necessary to monitor further changes in its status.
Accepted – the data provider has reported for the period specified in the report.
Rejected – the report is rejected due to filling errors or other reasons, which are indicated in the “Reason for rejection” field. A new version of the report must be submitted after eliminating the specified errors. If the report status is “Rejected” – the data provider has not reported for the period specified in the report.
Last updated: 26-02-2026