Account management for heads and administrators
Account management for heads and administrators
The e. Statistics system can only be used by a data provider representative registered in the system. Data provider representation accounts for heads of legal entities are created automatically. You will find the representation account by logging in to the e. Statistics system via the Electronic Government Gateway (see the instructions “How to log in to the e. Statistics system via the Electronic Government Gateway”).
When another representative is granted the administrator role during the creation of a representation account, his rights and capabilities in the e. Statistics system are equivalent to the rights of a head.
A head (and another representative with administrator rights) can perform the following functions in the e. Statistics:
1. Creating a user login account (relevant when connecting for the first time)
2. Self-resetting the password
3. Creating an account for a new representative
4. Confirming a representation request (submitted by the representative)
5. Suspending an unnecessary representative representation account
Note: (Parts 3, 4, 5 are intended exclusively for heads and users with the administrator role.)
1. Creating a user login account
Representation accounts for heads of legal entities are created automatically, but login accounts are required for all users logging in for the first time. In order to create a login account, you must log in to the e. Statistics system via the Electronic Government Gateway (see the instructions “How to log in to the e. Statistics system via the Electronic Government Gateway”).
Familiarize yourself with the Rules for the Electronic Preparation and Transmission of Statistical and Administrative Data in the e. Statistics system and mark that you agree to follow them (Figure 1)
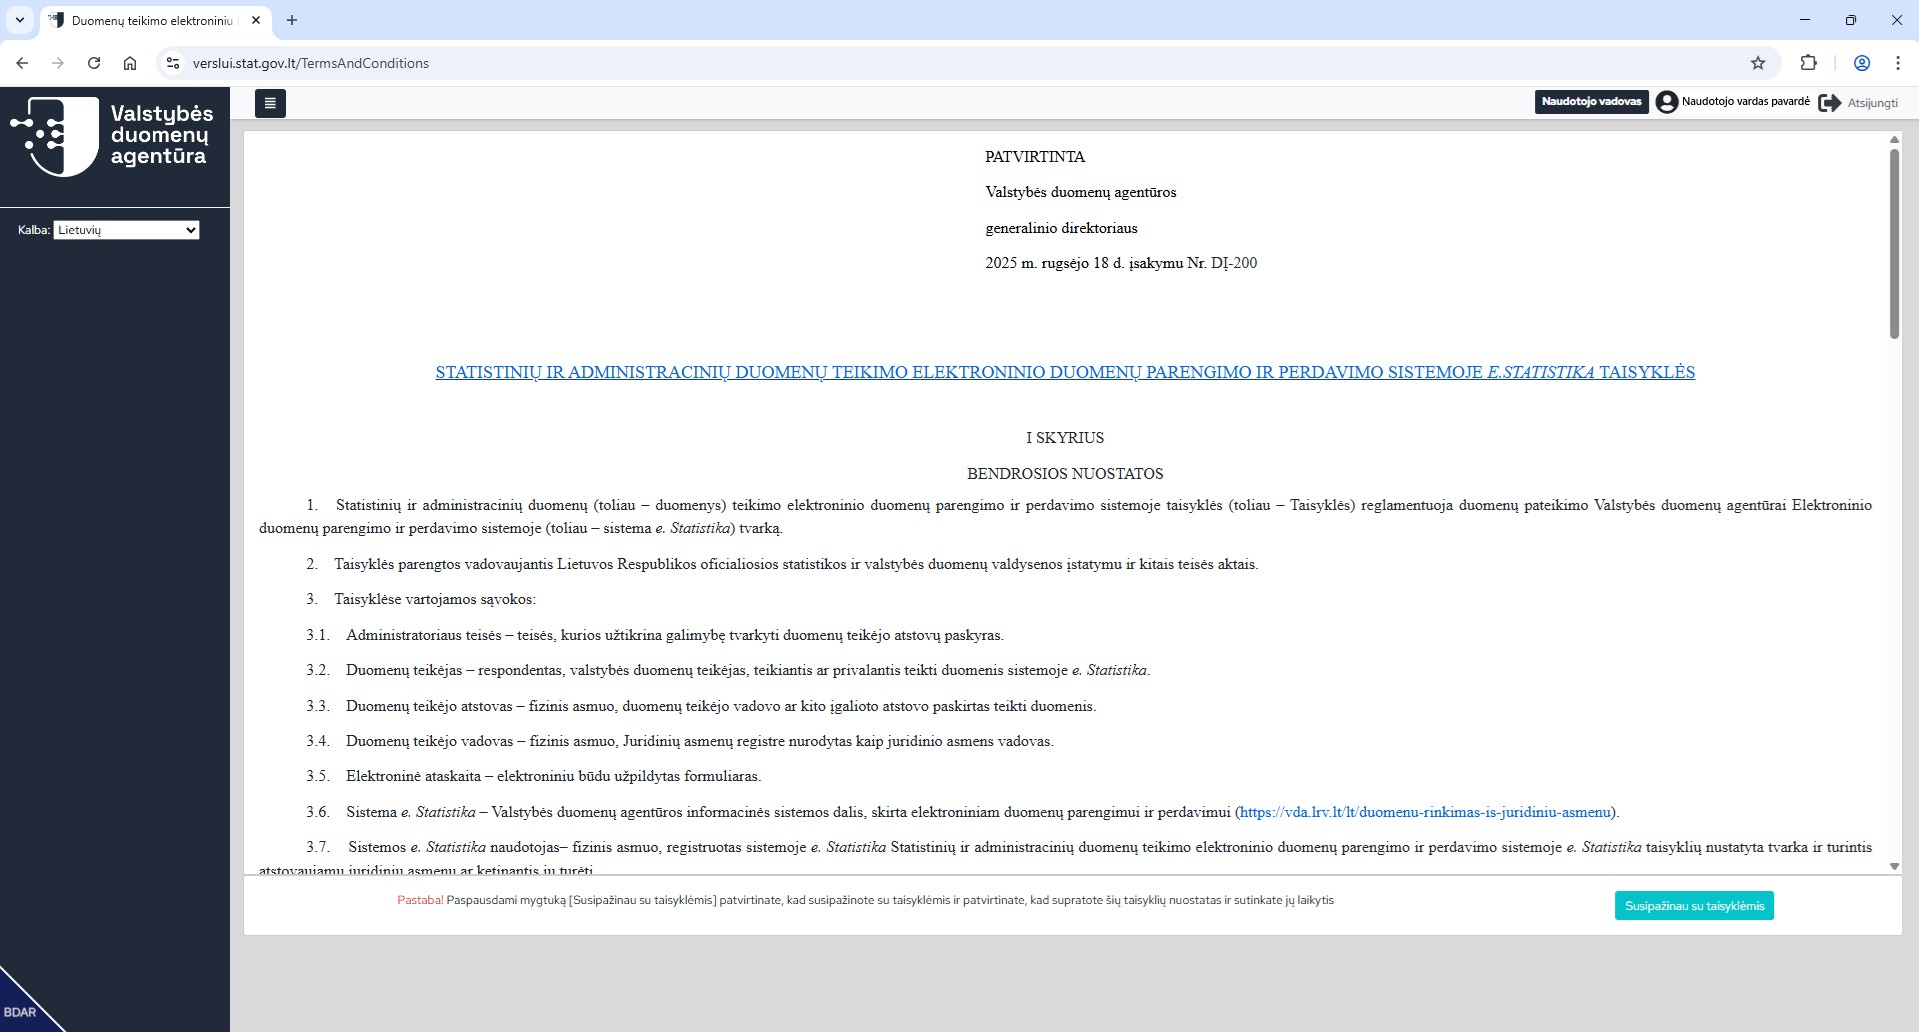
Figure 1. The e. Statistics System Rules confirmation window
After clicking the button [I have read the Rules], the user login account creation window opens (Figure 2):
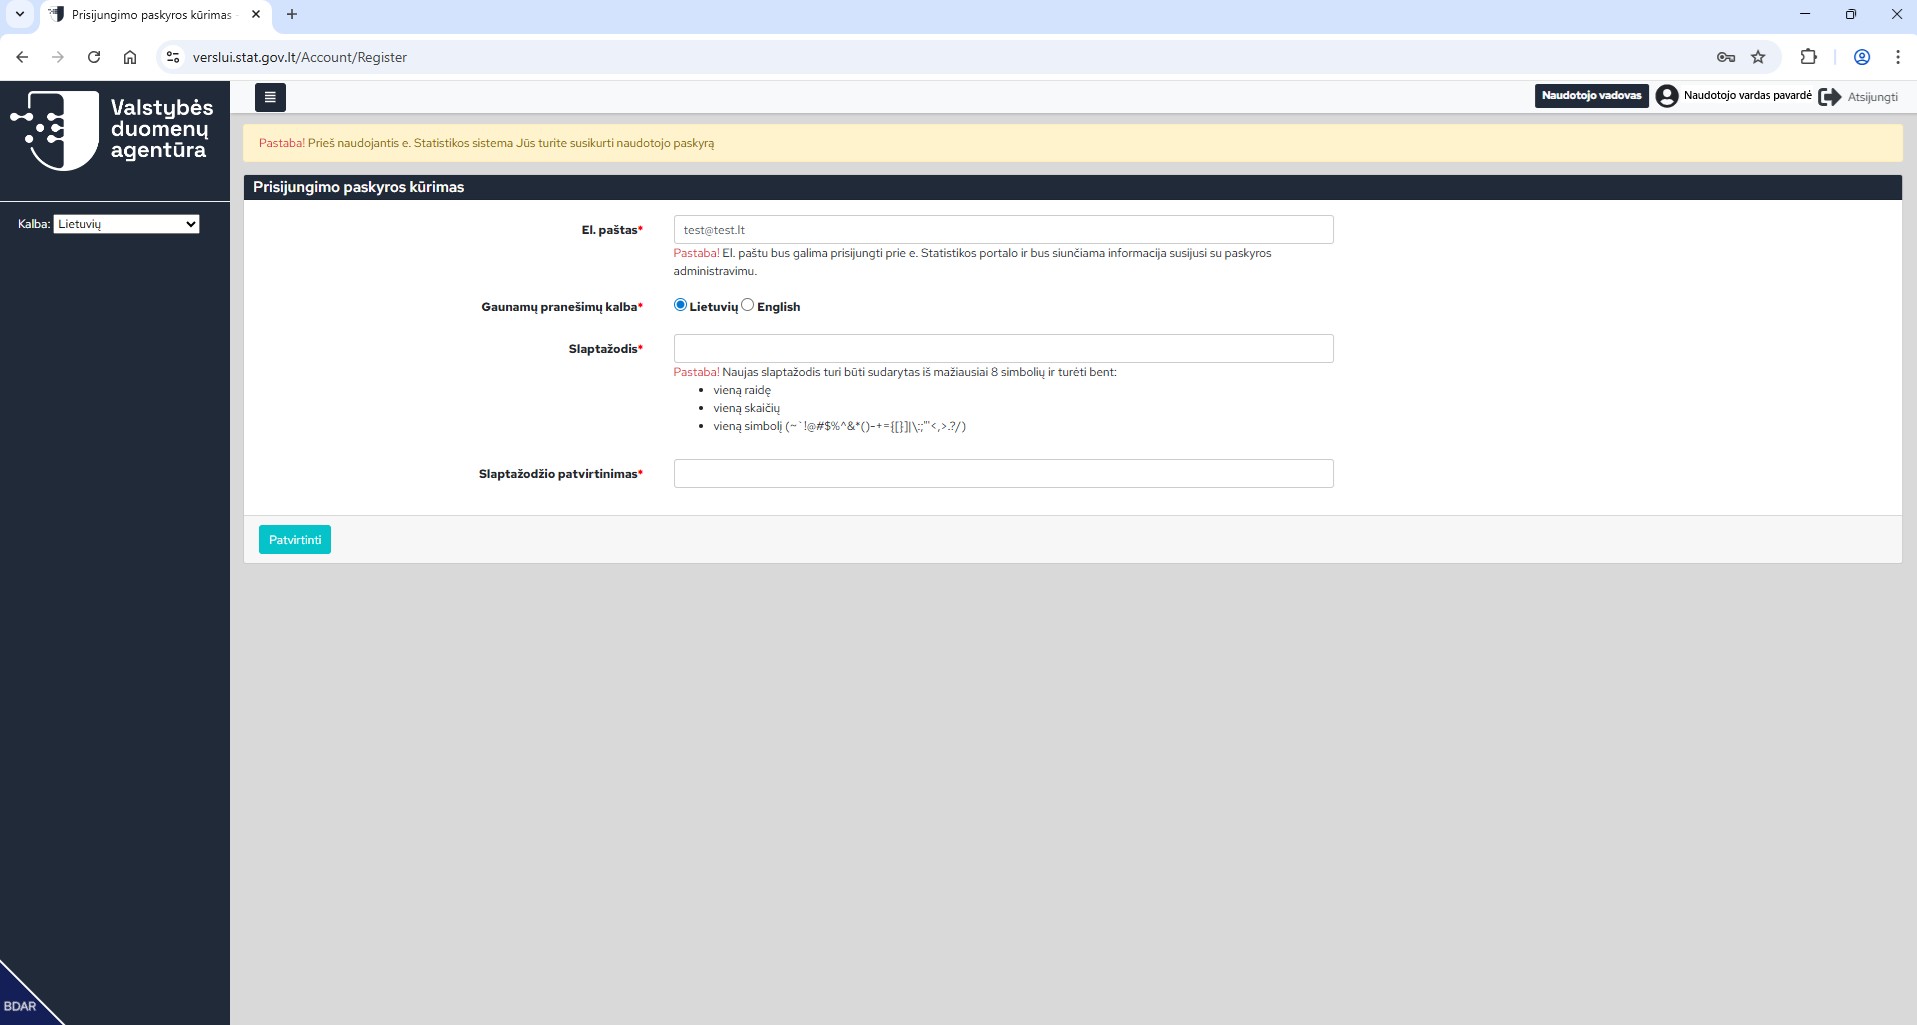
Figure 2. The e. Statistics system user login account creation window
The required information must be entered in the user login account creation window:
- Email – enter your email address (the system automatically loads the user’s email address, which was received from the State Information Resources Interoperability Platform (VIISP).
- Password – enter a new password (the password must consist of at least 8 characters and contain at least one letter, at least one number and at least one special character (~`!@#$%^&*()-+={[}]|\:;"'<,>.?/).
- Password confirmation – repeat the new password.
After entering the information, press the [Confirm] button.
An automatic message with a link to confirm the login account is sent to the user’s email address, which is valid for 30 minutes from the time of sending.
Note: in the future, you will be able to connect to the e. Statistics system both through the Electronic Government Gateway and using the login account email address and the created password.
2. What to do if you forgot your login password?
If you forgot your login account password, use the password recovery function “Forgot your password?” (Figure 3).
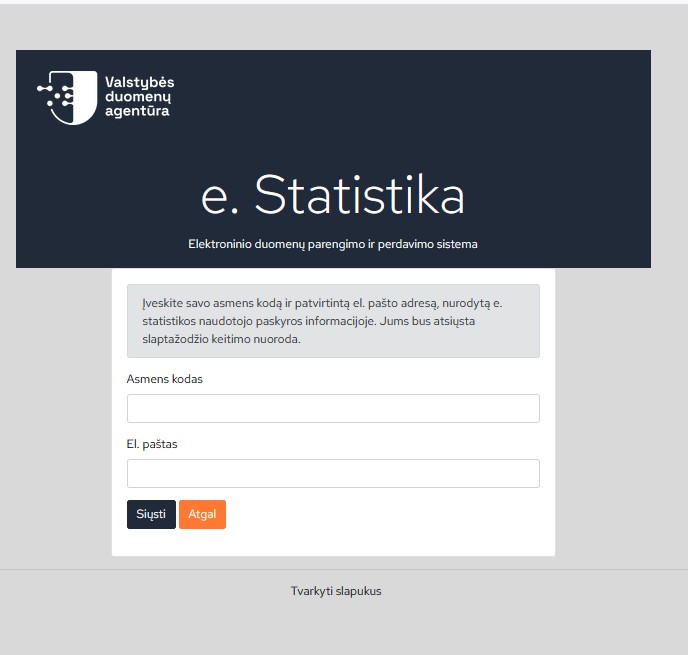
Figure 3. Password recovery window
In the password recovery window, enter the required data and click the [Send] button.
- If the entered data is not found in the system, an error message “Incorrect user data entered or the user does not exist in the system” is displayed.
- If the entered data is found in the system, a password change link is sent to the user’s email. Clicking on the received link opens a window for entering a new password.
3. Creating an account for a new representative
An account for a new representative can be created by the head of a legal entity, as well as another representative of a data provider with administrative rights in the system, who has logged in to his/her representation account.
Log in to your login account in the e. Statistics system in one of the following ways:
- log in via the Electronic Government Gateway by entering the data required for identification;
- log in with a password.
Select the required data provider. You will find the new representative account creation window by following these steps (Figure 4):
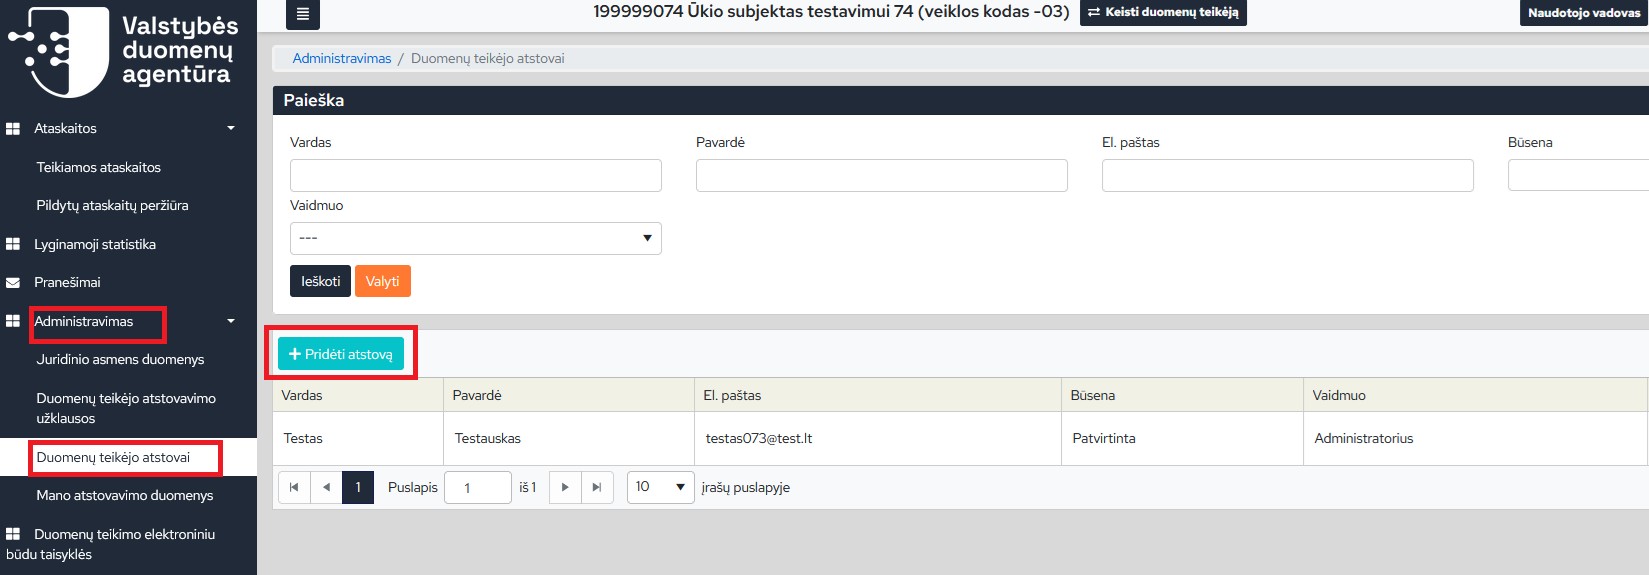
Figure 4. Creating a new representative account
1. Select [Administration] from the menu list
2. Click [Data provider representatives]
3. Click [+ Add representative]
In the new representative addition window that opens (Figure 5), it is important to enter personal data of the future representative very carefully: personal ID, first name, last name, contacts. If an error is made when specifying the personal ID, the representative will not be able to confirm the created account, if an error is made when entering the email address, the e. Statistics system messages will not reach the addressee.
By default (Figure 5), the representative is granted all rights to represent the data provider, i.e. he/she can administer the legal entity account and has access to all its reports. If you want your new representative to only be able to submit or view reports, change the representation role – select “Reporter” or “Viewer”.
After entering all the data, click [Confirm].
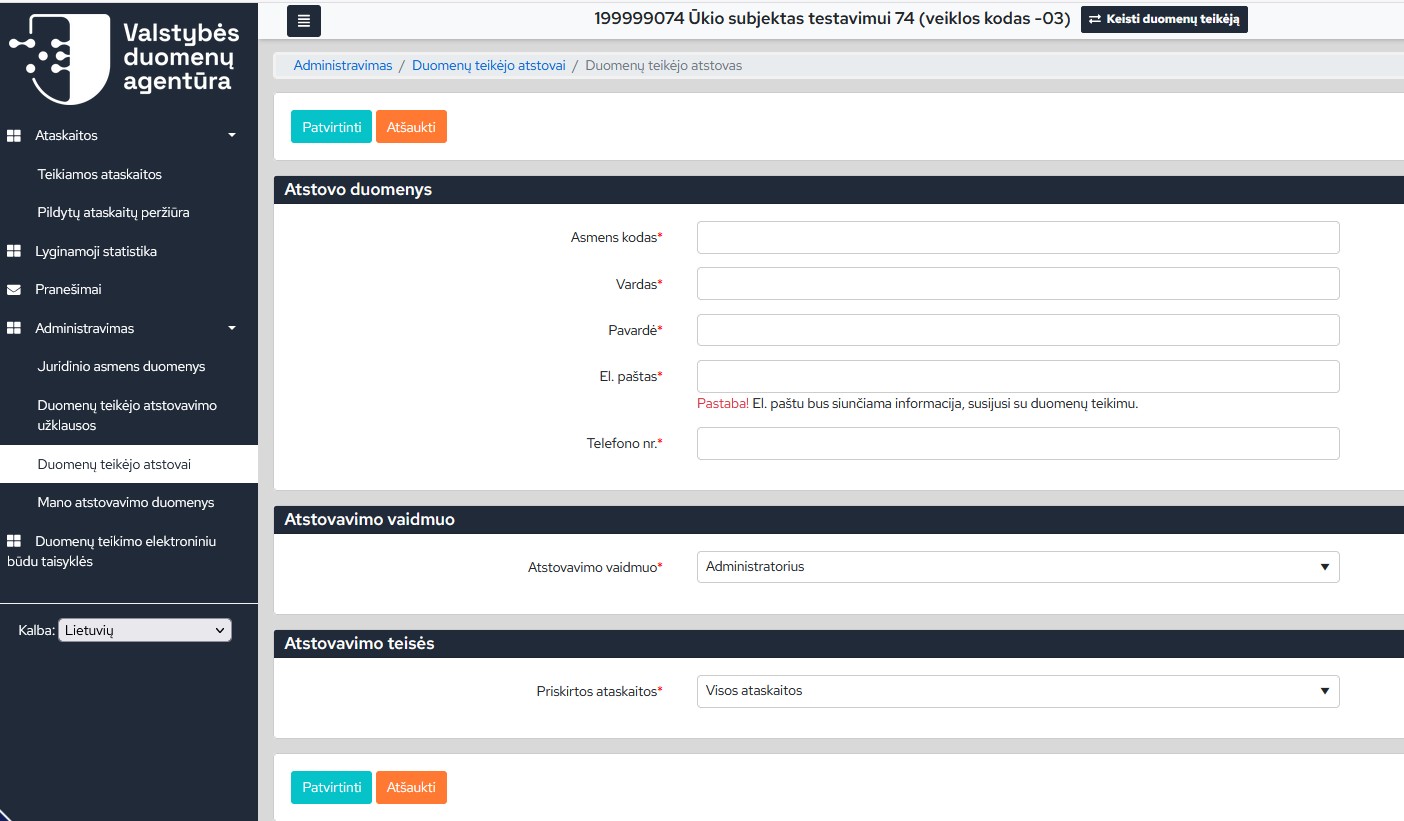
Fig. 5. New representative addition window
If the representative for whom you are creating a representation account should be responsible only for submitting a certain report or part of the reports, adjust the “Representation rights”: instead of “All statistical reports”, select “Part of statistical reports”, by clicking the [Add] button, a list of reports will open and you will be able to assign the required report to the representative. For example, Fig. 6 shows the granting of representation rights to a respondent’s representative by assigning him to prepare two reports: DA 01 (quarterly) and DUS-01 (every 4 years).
Fig. 5. New representative addition window
If the representative for whom you are creating a representation account should be responsible only for submitting a certain report or part of the reports, adjust the “Representation rights”: instead of “All reports”, select “Part of reports”, by clicking the [Add] button, a list of reports will open and you will be able to assign the required report to the representative. For example, Fig. 6 shows the granting of representation rights to a respondent’s representative by assigning him/her to prepare two reports – DA 01 (quarterly) and DUS-01 (every 4 years).
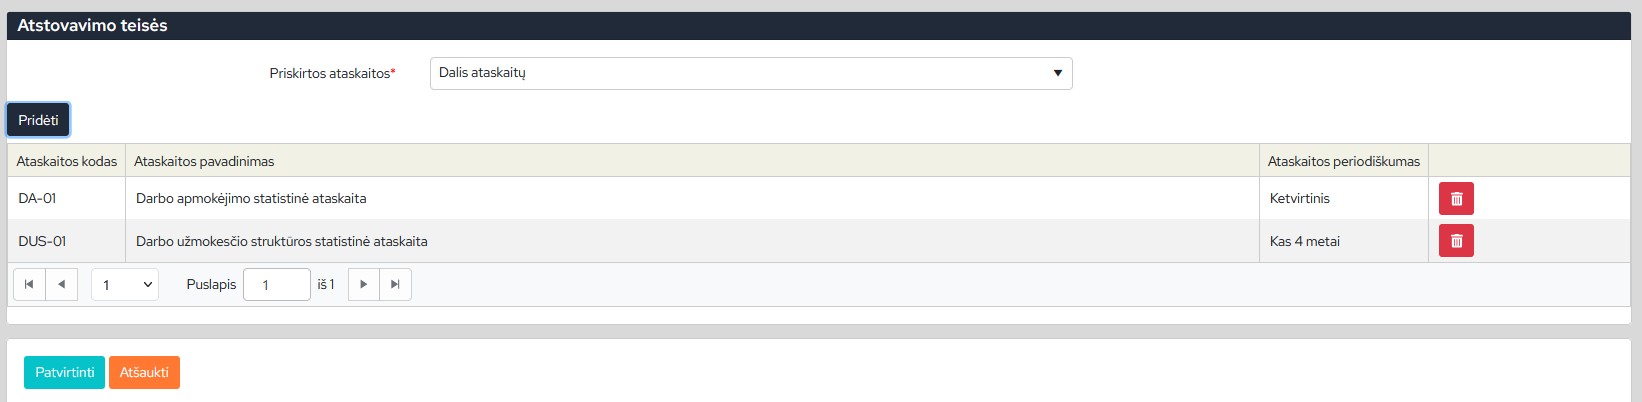
Figure 6. Granting representation rights, assigning the representative to prepare reports DA-01 (quarterly) and DUS-01 (every 4 years)
To save the data of the representation account being created, click the [Confirm] button. Your new representative will receive a notification that he/she must approve the representation account.
When the representative reviews and approves the representation account created for him/her, the system will automatically send information messages to the data provider head and all representatives with administrative rights.
4. Approval of the data provider’s representation request
Persons who wish to become representatives of the legal entity you represent in the e. Statistics system can submit a representation request themselves. In order for a person to become a representative, you must approve his/her representation request. You will be able to approve the submitted representation request if you are the head of a legal entity or another representative with the administrator role.
When a person creates a representation account, a notification is sent to you by email. In order to be able to view it, you must log in to the representation account of a specific data provider in the e. Statistics system. Follow these steps:
1. Log in to the e. Statistics in one of the following ways:
- log in via the Electronic Government Gateway by entering the necessary identification data;
- log in with a password.
2. Select the required data provider from the list of represented data providers.
3. In the menu list, click [Administration]-> [Data provider representation requests].
4. Select the required representative and click [Open request].
Example Fig. 7
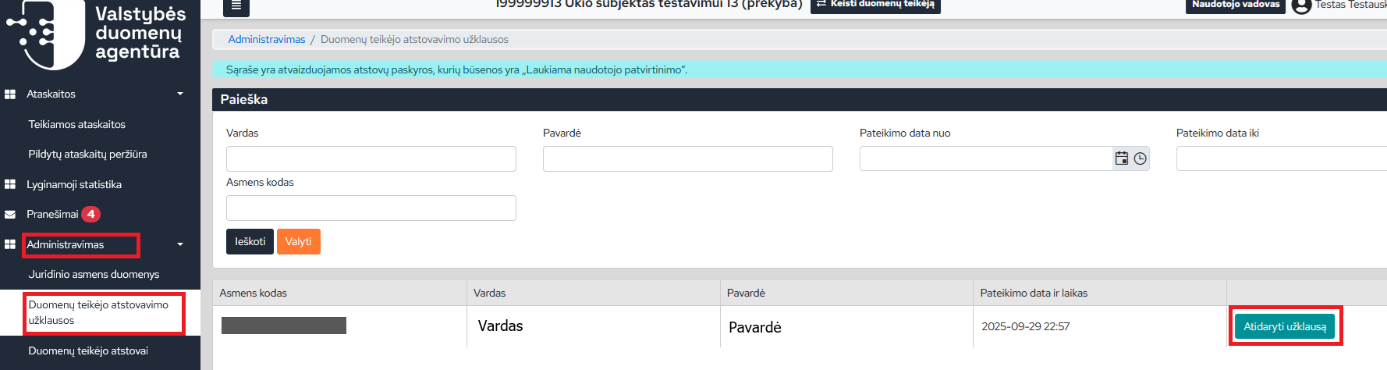
Figure 7. Data provider representation request search window
By clicking [Open request], you will see all the data of the person who submitted the representation request in the preview window (Figure 8).
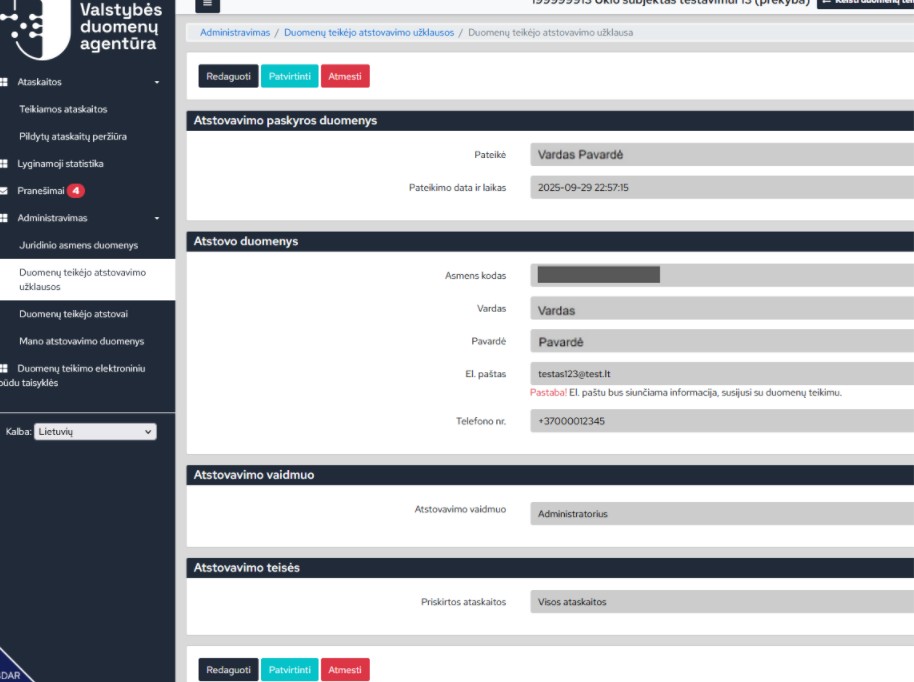
Figure 8. Representation request preview window
If the representative, his/her data and the selected representation role seem appropriate to you, click [Confirm].
By clicking the [Edit] button, you will be able to adjust certain representation account data (you can edit those fields that are not marked in gray). After making changes, do not forget to save them.
If you do not know the person who submitted the representation request or do not want him/her to represent your legal entity, click [Reject].
After you approve or reject the representation request, the representative will be informed of the action taken by email.
5. Suspending validity of an unnecessary representative representation account
The validity of representatives’ representation accounts must be suspended when the employment relationship is terminated, the accounting management agreement expires or other circumstances arise.
The validity of representation accounts can be suspended by heads and other data provider representatives with the administrator role, after logging into their representation accounts and completing the following steps (Figure 9):
1. Log in to the e. Statistics system in one of the following ways:
- log in through the Electronic Government Gateway by entering the necessary identification data;
- log in with a password.
2. Select the required data provider from the list of represented data providers.
3. Select [Administration]-> [Data provider representatives] from the menu list.
4. Clicking [More] will open the data provider representative account viewing window (Figure 10).
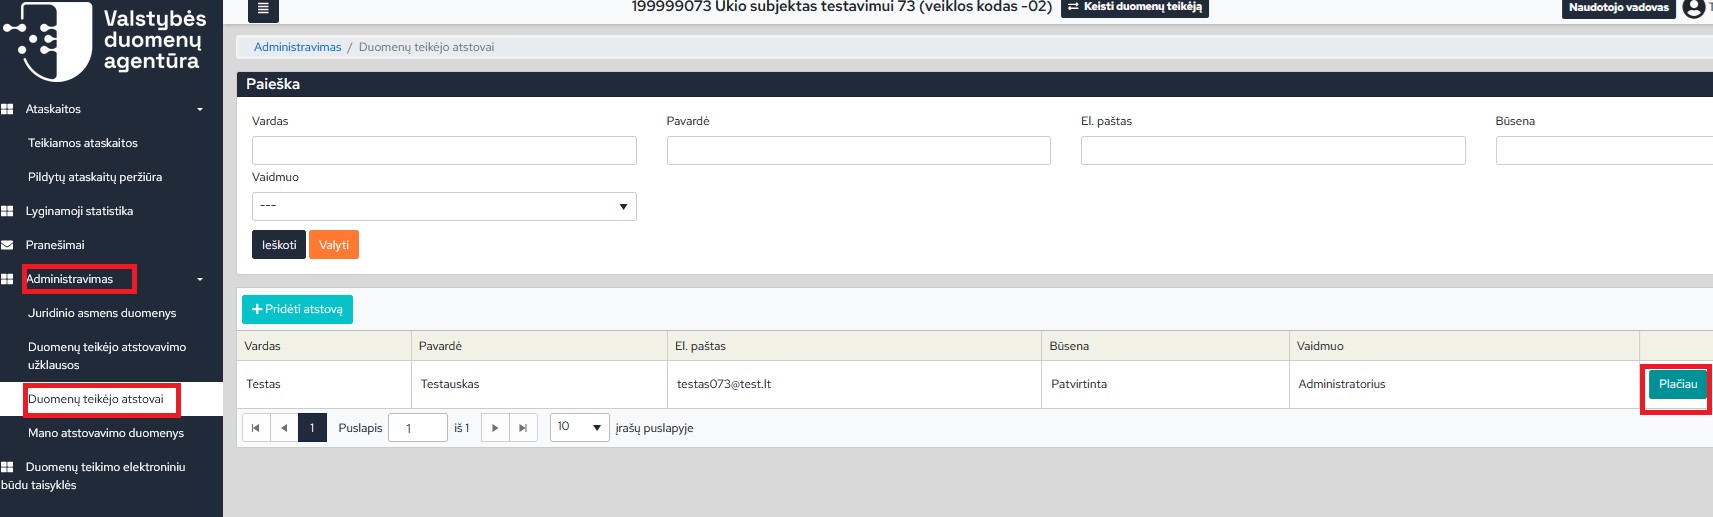
Figure 9. Data provider representative list window
In the data provider representative account review window (Figure 10), you can perform the following actions:
- By clicking [Edit] – adjust the data provider representative account data, if the fields are not “locked” (not marked in gray). After making changes, do not forget to [Save].
- By clicking [Stop representation] – suspend the validity of the representative’s representation account. After you perform this action, the representative logged in to his/her login account will not see this represented data provider, i.e. will no longer be able to submit reports on behalf of the data provider, nor see data provided by other representatives. Suspending the validity of a certain representative’s representation account and creating a representation account for a new representative is necessary when the accountant or other representatives submitting reports change.
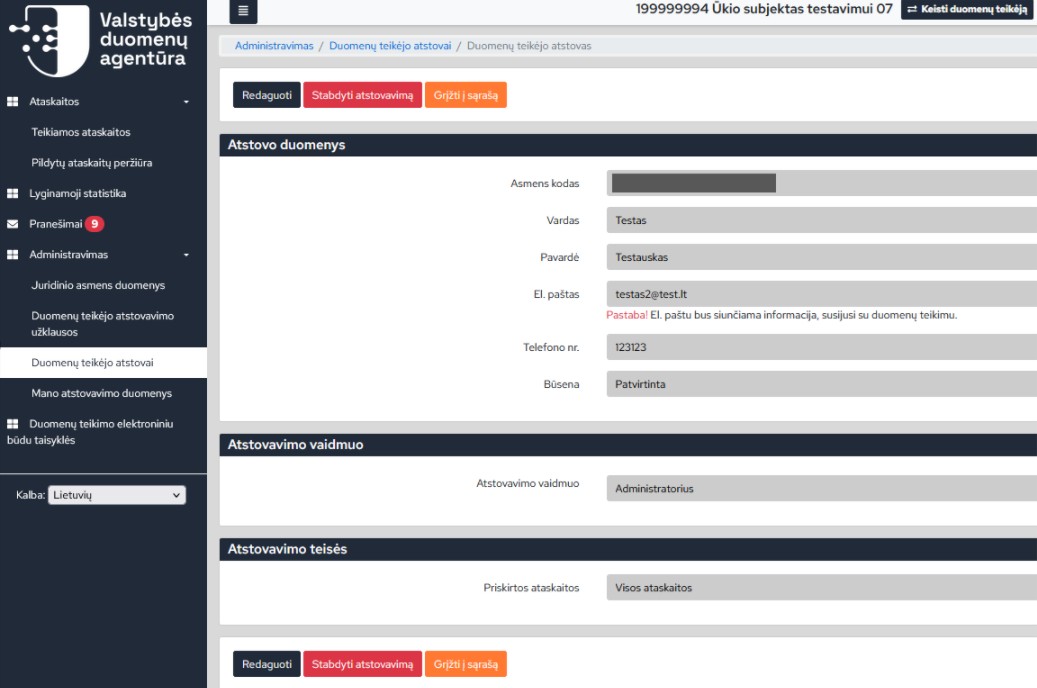
Figure 10. Data provider representative account view window
After suspending the representation, the representative’s name does not disappear from the list, only the status of the representation account changes to “Suspended”. If the working relationship with such a representative is restored, you can restore the validity of his/her representation account by clicking the [Renew representation] button.
Please note that the [Renew representation] button will be visible only for those accounts whose status is “Suspended”.
Last updated: 26-02-2026